
EKS + RDS + PostgreSQL
- Create a voting app
- Run locally using docker image and docker-compose
- Create a private RDS PostgreSQL database to store the votes
- Run the application locally using an EC2 bastion host + a SSH tunnel
- Create an ECR repository and host our docker image
- Create an EKS cluster
- Test EKS pods connexion to the RDS instance
- Deploy the application to the EKS cluster

The application
You can fork this project
We will first run the app locally to showcase it
We start the PostgreSQL docker image with this command :
# run postgres alpine docker image
$ make pg
This command runs this script :
docker run \
    --rm \
    --name postgres \
    --env POSTGRES_PASSWORD=password \
    --publish 5432:5432 \
    postgres:14.3-alpine
We add content to this database
In a new terminal window, run the following command :
# seed postgres instance
$ make seed
This command runs this script :
psql postgresql://postgres:password@0.0.0.0:5432/postgres < sql/create.sql
We now start the node application :
# run vote website using npm - dev mode
$ make vote
This command runs this script :
npx livereload . --wait 200 --extraExts 'njk' & \
    NODE_ENV=development \
    VERSION=od1s2faz \
    WEBSITE_PORT=4000 \
    POSTGRES_DATABASE=postgres \
    POSTGRES_PASSWORD=password \
    npx nodemon --ext js,json,njk index.js
The application runs at http://localhost:4000 :

You can close all processes and terminal windows
Using docker-compose
To simplify our life, we can reduce the previous steps using docker-compose :
# run the project using docker-compose (same as pg + seed + vote)
$ make up
This command runs this script :
docker-compose \
    --file docker-compose.dev.yml \
    up \
    --remove-orphans \
    --force-recreate \
    --build \
    --no-deps
The docker-compose.dev.yml file starts PostgreSQL and initializes the table before starting the node application :
services:
  vote:
    container_name: vote
    build:
      context: ./vote
      dockerfile: Dockerfile.dev
    volumes:
      - "./vote:/app"
    # ...
    networks:
      - backend
    depends_on:
      postgres:
        condition: service_healthy

  postgres:
    container_name: postgres
    image: postgres:14.3-alpine
    ports:
      - "5432:5432"
    environment:
      - POSTGRES_PASSWORD=password
    volumes:
      - ./sql/create.sql:/docker-entrypoint-initdb.d/init.sql
    healthcheck:
      test: "exit 0"
    networks:
      - backend
The application runs at http://localhost:3000 :

To properly terminate the application, run this command in a new terminal window :
# stop docker-compose + remove volumes
$ make down
This command runs this script :
docker-compose \
    --file docker-compose.dev.yml \
    down \
    --volumes
Creating the RDS PostgreSQL + ECR repository
We create a VPC and RDS PostgreSQL using this command :
# terraform create vpc + rds postgresql db + ecr repo
$ make rds-ecr-create
This command creates our resources by using a new Terraform project
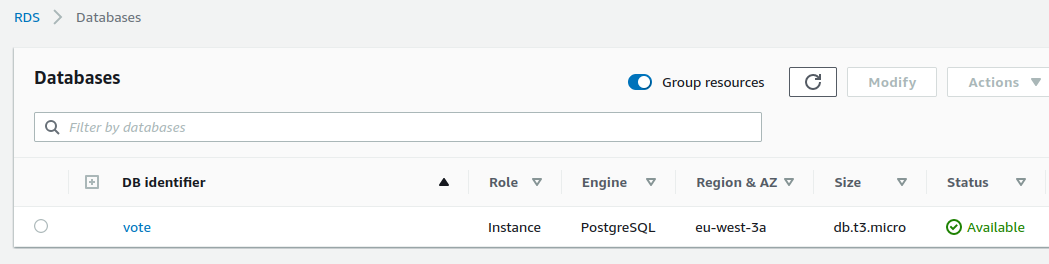
Our private database has been created :
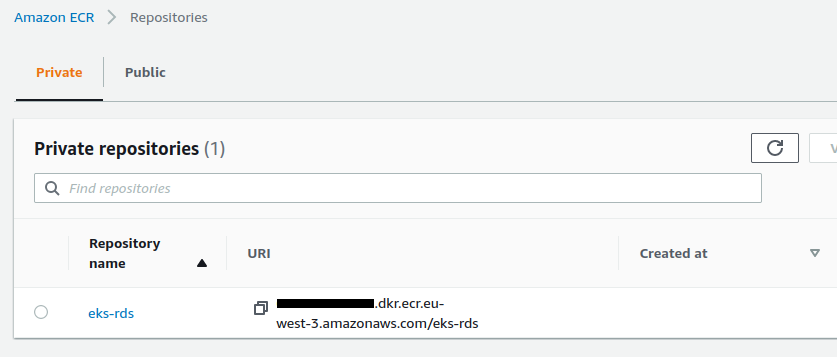
The ECR repository has been created :
Creating the bastion host
The PostgreSQL database we created is private
We can’t connect to it from our local computer
We need to create an EC2 instance, which will serve as a bastion host, to create an SSH tunnel in order to be able to connect to the database
We execute this command :
# terraform create ec2 bastion for ssh tunnel
$ make bastion-ssh-create
This command creates our resources by using a new Terraform project
The bastion is created in the same VPC than the database :
resource "aws_instance" "bastion" {
  ami                         = data.aws_ami.latest_amazon_linux.id
  instance_type               = "t2.micro"
  key_name                    = aws_key_pair.key_pair.id
  associate_public_ip_address = true
  subnet_id                   = data.aws_subnets.subnets_public.ids[0]
  security_groups             = [aws_security_group.bastion_security_group.id]

  # ...
Only port 22 is open for this instance :
resource "aws_security_group" "bastion_security_group" {
  name   = "${var.project_name}-bastion-sg"
  vpc_id = data.aws_vpc.vpc.id

  ingress {
    protocol  = "tcp"
    from_port = 22
    to_port   = 22
    cidr_blocks = ["${data.http.my_ip.body}/32"]
  }

  # ...
And only my machine can interact with it :
data "http" "my_ip" {
  url = "https://ifconfig.me"
}
Once the EC2 instance is created, we open the SSH tunnel :
# create ssh tunnel
$ make ssh-create
The creation of the tunnel is done via this line :
ssh -i "$BASTION_KEY_FILE" -f -N -L 5433:$DB_ADDRESS:5432 ec2-user@$BASTION_PUBLIC_DNS -v
We add content to this database via this script :
# seed rds postgresql
$ make seed-aws
You can interact with the database through the SSH tunnel in a new terminal window :
# connection
$ psql postgresql://master:masterpass@127.0.0.1:5433/vote?sslmode=require

# query
vote=> select * from vote;
 name | value
------+-------
 up   |     0
 down |     0
(2 rows)
We now start a version of our local site that connects to our database via the SSH tunnel :
# run vote website using npm - dev mode (livereload + nodemon)
$ make vote-aws
This command runs this script :
npx livereload . --wait 750 --extraExts 'njk' & \
    NODE_ENV=development \
    VERSION=od1s2faz \
    WEBSITE_PORT=4000 \
    POSTGRES_HOST=127.0.0.1 \
    POSTGRES_DATABASE=$POSTGRES_DATABASE \
    POSTGRES_USER=$POSTGRES_USERNAME \
    POSTGRES_PASSWORD=$POSTGRES_PASSWORD \
    POSTGRES_PORT=5433 \
    npx nodemon --ext js,json,njk index.js
Note the variables :
- The local host :
POSTGRES_HOST=127.0.0.1 - The shifted port :
POSTGRES_PORT=5433
The site works when on opens at http://localhost:4000 :

If we query our table in the still active terminal window :
vote=> select * from vote;
 name | value
------+-------
 up   |     2
 down |     1
(2 rows)
Our bastion demo is over, we can destroy our resources :
# close ssh tunnel
$ make ssh-close

# terraform destroy ec2 bastion for ssh tunnel
$ make bastion-ssh-destroy
Creating the EKS cluster
We need to create a docker image of our application to be able to deploy it in our cluster :
# push vote image to ecr
$ make ecr-push
This command creates the image and pushes it to ECR :
# ... build ...

aws ecr get-login-password \
    --region $AWS_REGION \
    --profile $AWS_PROFILE \
    | docker login \
    --username AWS \
    --password-stdin $AWS_ACCOUNT_ID.dkr.ecr.$AWS_REGION.amazonaws.com

docker tag vote $REPOSITORY_URL:vote
docker push $REPOSITORY_URL:vote
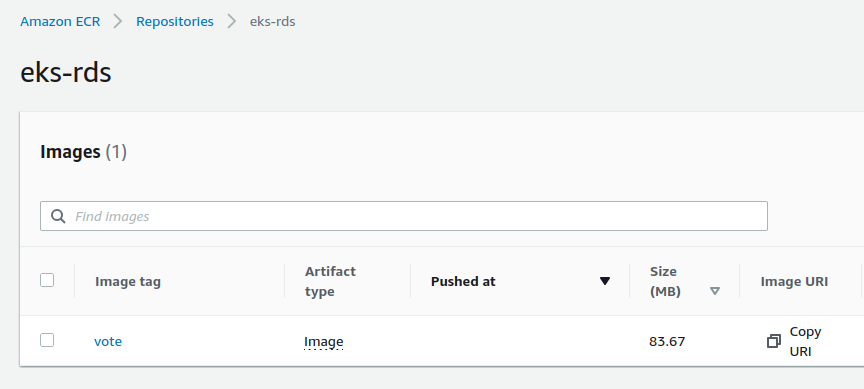
The image is online :
We create our EKS cluster using a Terraform project :
# terraform create eks cluster
$ make eks-create
The cluster creates a node group named green :
eks_managed_node_groups = {

  green = {
    min_size     = 1
    max_size     = 2
    desired_size = 1

    instance_types = ["t2.medium"]
    capacity_type  = "ON_DEMAND"
  }
}
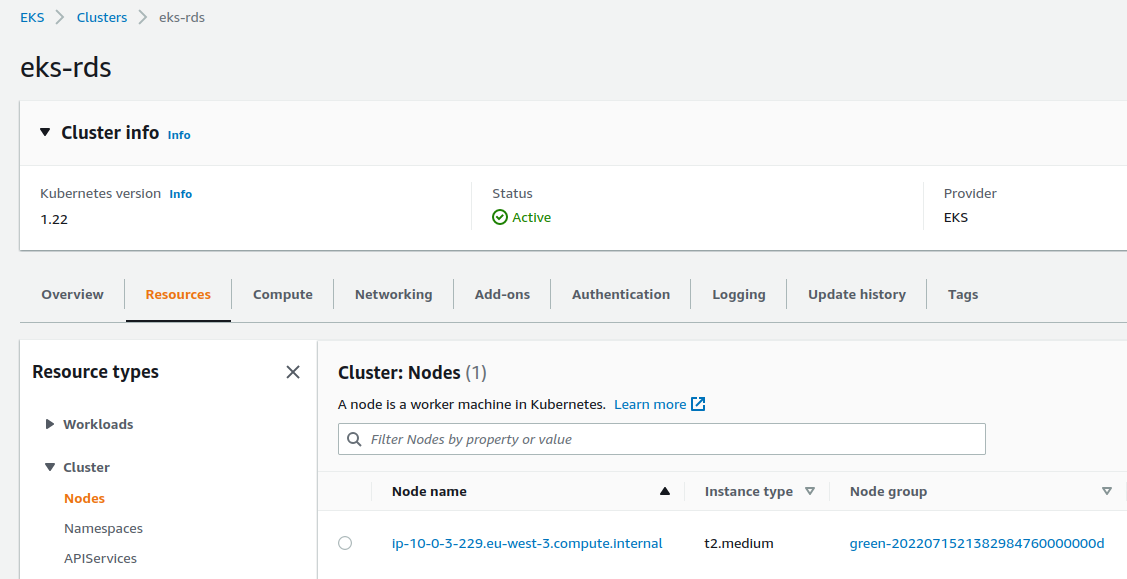
After a long wait, the cluster is created :
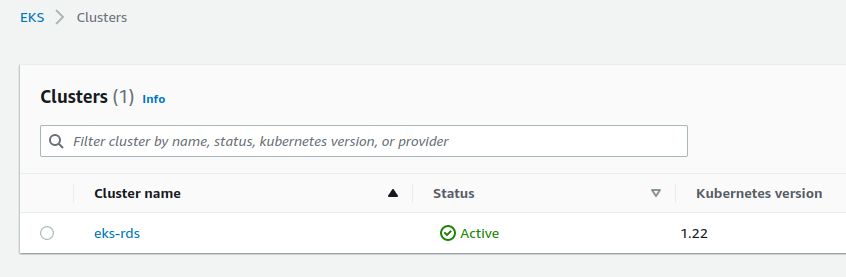
We can see our node group named green :
TIP : kubectl is configured via a null_resource :
resource "null_resource" "update_kubeconfig" {
  provisioner "local-exec" {
    command = "aws eks update-kubeconfig --name ${module.eks.cluster_id} --region ${var.region}"
  }

  depends_on = [module.eks]
}
We can query the cluster :
$ kubectl get ns
NAME              STATUS   AGE
default           Active   5m
kube-node-lease   Active   5m
kube-public       Active   5m
kube-system       Active   5m
Connect the cluster with the RDS database
We will test the connection with our PostgreSQL database
In a new terminal window we show the contents of the vote namespace :
$ watch kubectl get all -n vote
Nothing is displayed for the moment since the namespace does not exist yet !
We create our namespace in another terminal window :
$ kubectl create ns vote
We start an interactive alpine image :
$ kubectl run alpine --image=alpine -i --tty -n vote
Our previous window displays the status of our resources :
NAME         READY   STATUS    RESTARTS   AGE
pod/alpine   1/1     Running   0          10s
We are connected to the alpine instance, we install postgresql :
apk --update add postgresql-client
We will try to connect
IMPORTANT : the POSTGRES_HOST variable must be defined with the value contained in the .env_DB_ADDRESS file which is at the root of the project
POSTGRES_USERNAME=master
POSTGRES_PASSWORD=masterpass
POSTGRES_HOST=vote.xxxxx.eu-west-3.rds.amazonaws.com
POSTGRES_DATABASE=vote
psql postgresql://$POSTGRES_USERNAME:$POSTGRES_PASSWORD@$POSTGRES_HOST:5432/$POSTGRES_DATABASE?sslmode=require
The connection fails
You can leave the connection attempt via a Ctrl+C
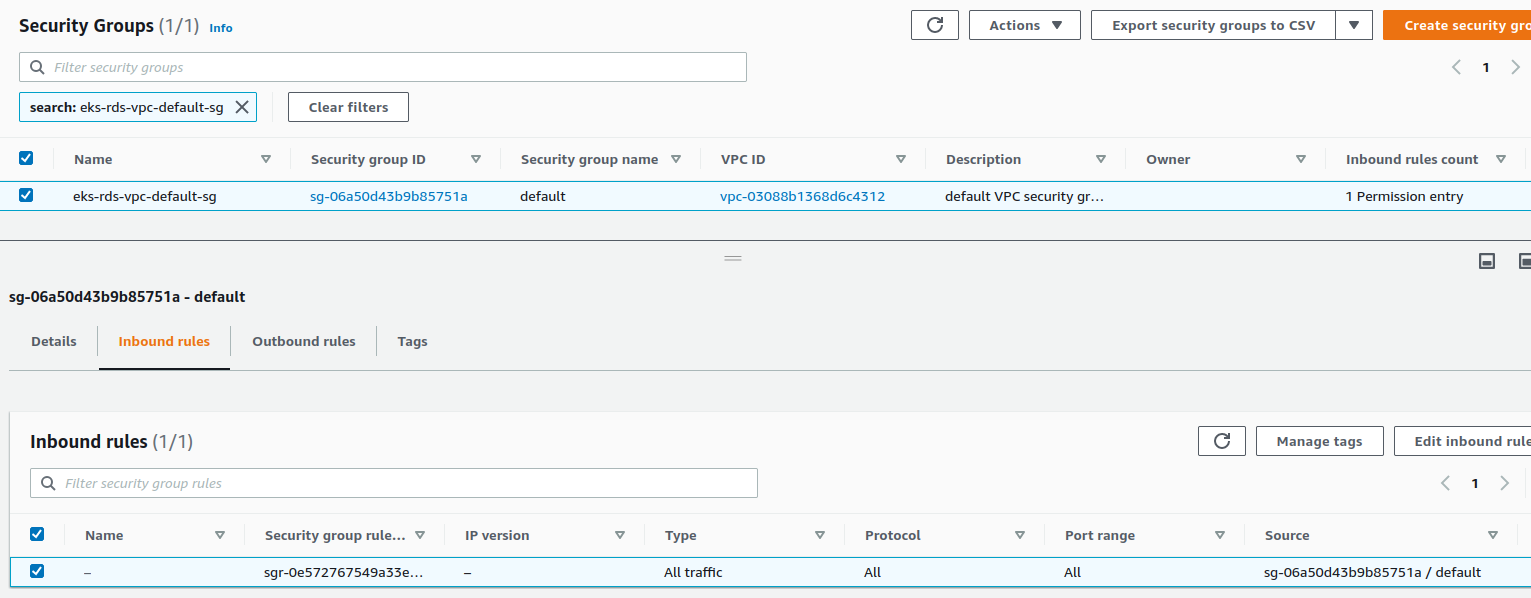
If we look at the default security group of our VPC, we see that it allows all traffic on itself :
We will create add a new inbound rule by uncommenting this script :
This rule allows traffic on port 5432 from the security group linked to node group green :
resource "aws_security_group_rule" "postgresql_ec2_instances_sg" {
  security_group_id = data.aws_security_group.default_security_group.id
  type      = "ingress"
  protocol  = "tcp"
  from_port = 5432
  to_port   = 5432

  source_security_group_id = module.eks.eks_managed_node_groups.green.security_group_id
  lifecycle {
    create_before_destroy = true
  }
}
The security group was created previously by the terraform module
We deploy again :
# terraform create eks cluster
$ make eks-create
The rule has been added :
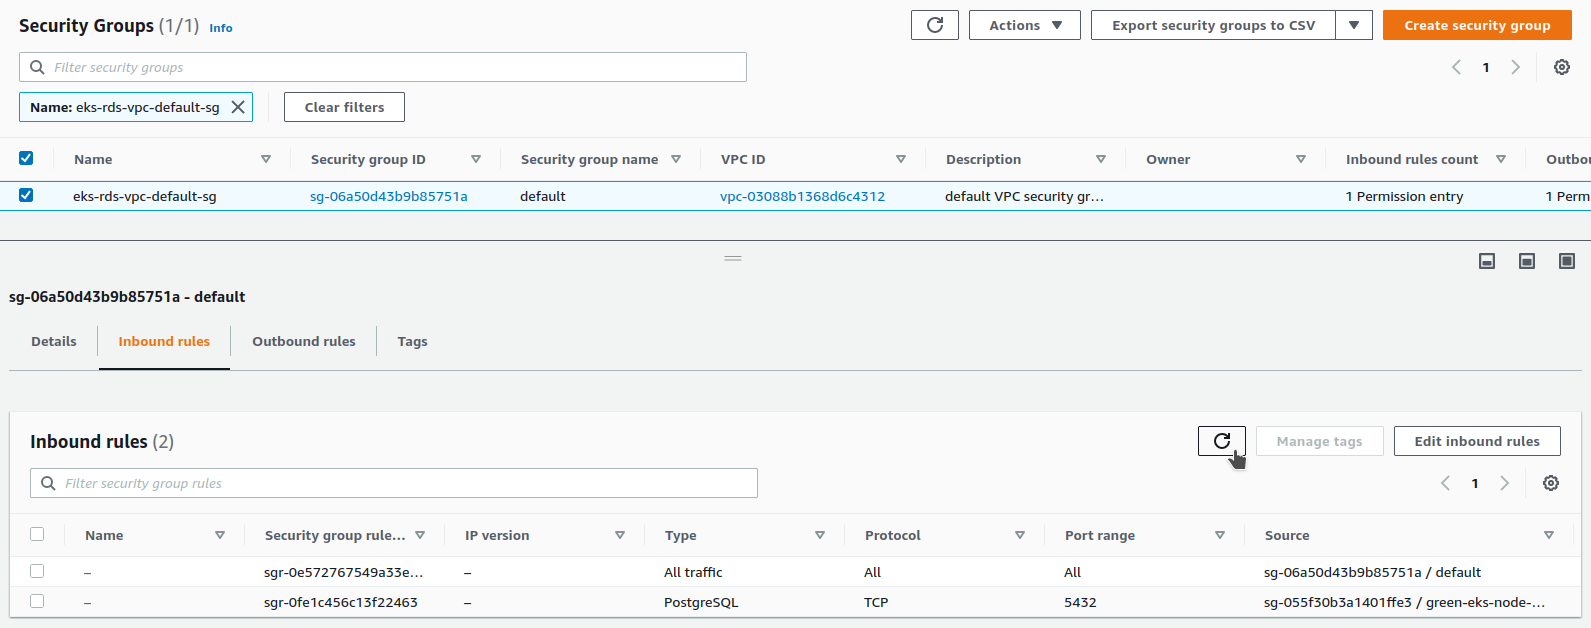
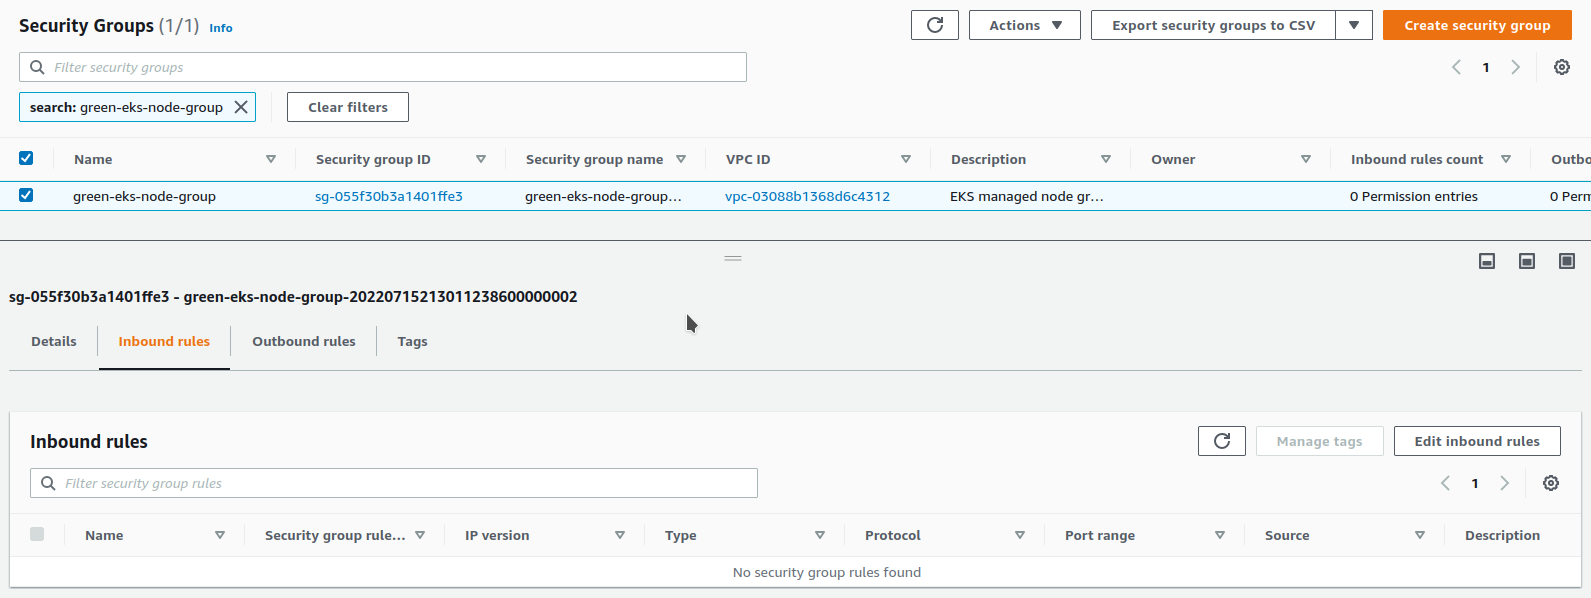
The source of our rule is the security group linked to the group node green
If we display it, we see that this one has no rules :
Where do we find this security group ?
Let’s go see our group node green :
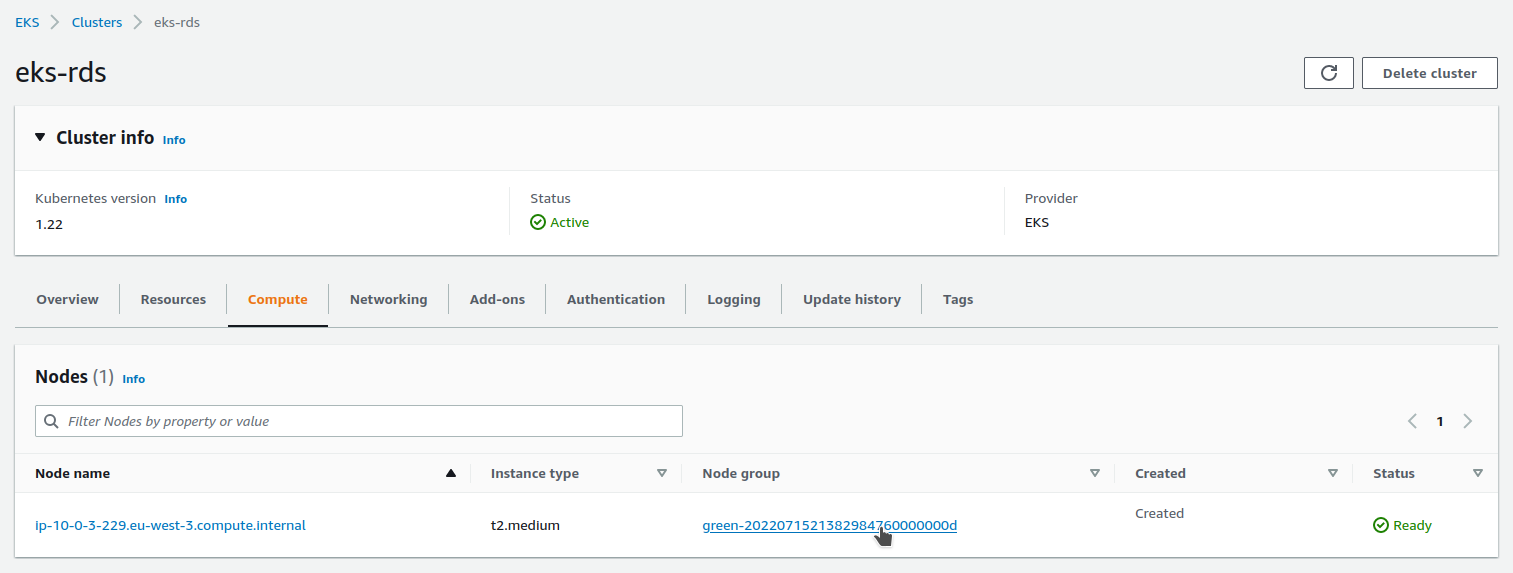
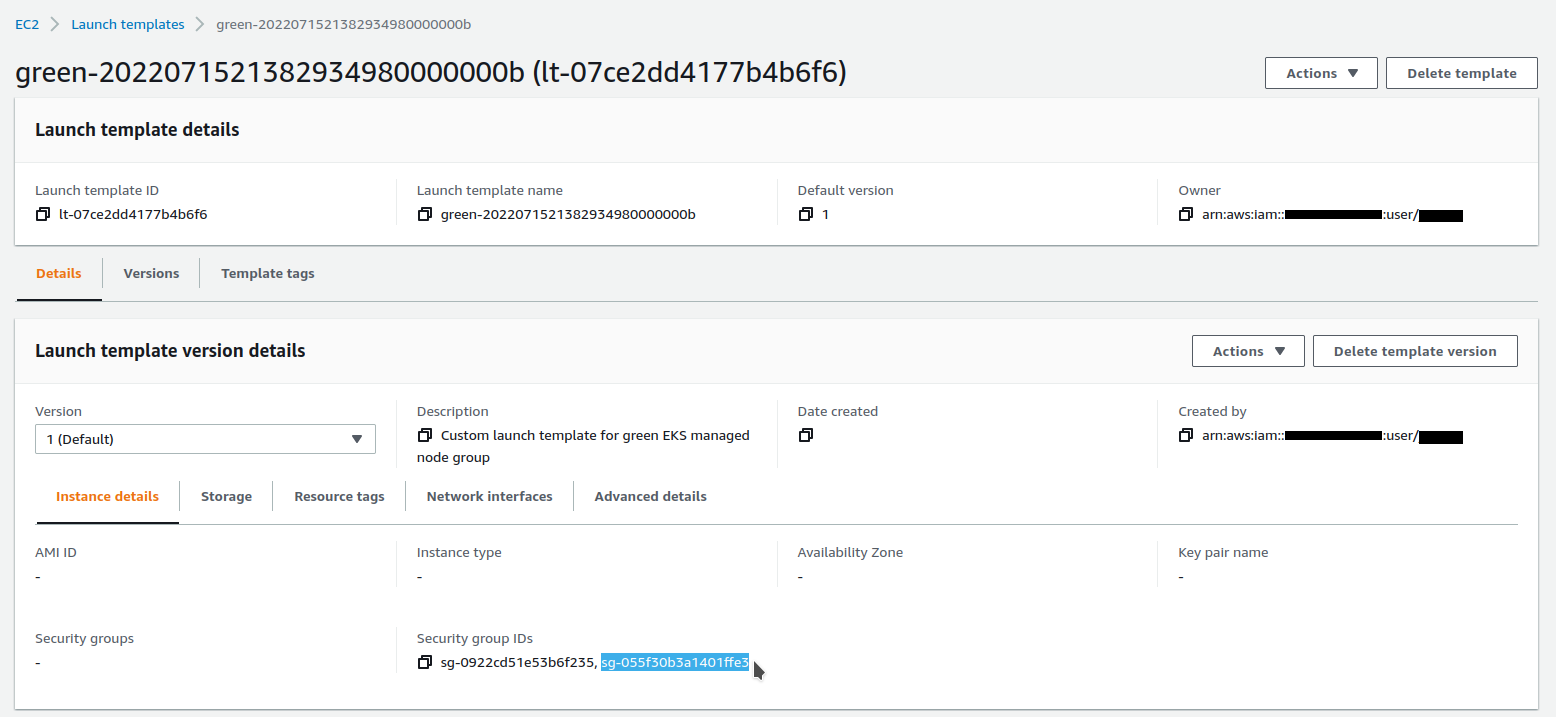
We click to access its Launch template :

Here we find the reference to our security group :
In our previous alpine terminal window, we try to connect again :
psql postgresql://$POSTGRES_USERNAME:$POSTGRES_PASSWORD@$POSTGRES_HOST:5432/$POSTGRES_DATABASE?sslmode=require

vote=> select * from vote;
 name | value
------+-------
 up   |     2
 down |     1
(2 rows)
Deploying the application
We deploy the application with this command :
# kubectl deploy vote
$ make kubectl-vote
Important : this command uses the kyml application which must be installed
Here is a video demonstration of using kyml
We use the kyml tmpl subcommand to inject variables into our template :
kubectl apply --filename k8s/namespace.yaml
kubectl apply --filename k8s/service.yaml

kyml tmpl \
    -v DOCKER_IMAGE=$REPOSITORY_URL:vote \
    -v POSTGRES_HOST=$DB_ADDRESS \
    -v POSTGRES_DATABASE=$POSTGRES_DATABASE \
    -v POSTGRES_USER=$POSTGRES_USERNAME \
    -v POSTGRES_PASSWORD=$POSTGRES_PASSWORD \
    < k8s/deployment.yaml \
    | kubectl apply -f -
Our resources are updated in our watching terminal :
NAME                        READY   STATUS    RESTARTS   AGE
pod/alpine                  1/1     Running   0          25m
pod/vote-6664df474b-lz8nn   1/1     Running   0          20s

NAME           TYPE           CLUSTER-IP       EXTERNAL-IP                               PORT(S)        AGE
service/vote   LoadBalancer   172.20.188.227   xxxxx-xxxxx.eu-west-3.elb.amazonaws.com   80:32693/TCP   25s

NAME                   READY   UP-TO-DATE   AVAILABLE   AGE
deployment.apps/vote   1/1     1            1           20s

NAME                              DESIRED   CURRENT   READY   AGE
replicaset.apps/vote-6664df474b   1         1         1       20s
We get the URL of our Load balancer :
# get load balancer url
$ make load-balancer
xxxxx-xxxxx.eu-west-3.elb.amazonaws.com
After a wait, our website is available and working :

We can query our table in our connected terminal via the alpine image :
vote=> select * from vote;
 name | value
------+-------
 down |     1
 up   |     4
(2 rows)
This demonstration is over, it is important to remove all resources :
# terraform destroy eks cluster
$ make eks-destroy
Wait for the previous script to complete to run this one :
# terraform destroy vpc + rds postgresql db + ecr repo
$ make rds-ecr-destroy