
ArgoCD + Minikube + Ngrok + Github Webhook
- Create a Kubernetes cluster with Minikube
- Create a private Git repository on Github
- Install Argo CD in Kubernetes cluster
- Deploy our application using Argo CD
- Create a tunnel with Ngrok to make our local cluster accessible from Github
- Create webhook notification between Github and Argo CD
- See the almost instantaneous update of our Kubernetes application after another Git push

Setup the project
Get the code from this github repository :
Update the source / repoURL with your github username :
apiVersion: argoproj.io/v1alpha1
kind: Application
metadata:
  name: argocd-app
  namespace: argocd
spec:
  project: default

  source:
-    repoURL: git@github.com:jeromedecoster/argocd-test.git
+    repoURL: git@github.com:<YOUR_USERNAME>/argocd-test.git
    targetRevision: HEAD
    path: infra
  destination:
    server: https://kubernetes.default.svc
    namespace: my-app

  syncPolicy:
    syncOptions:
    - CreateNamespace=true

    automated:
      selfHeal: true
      prune: true
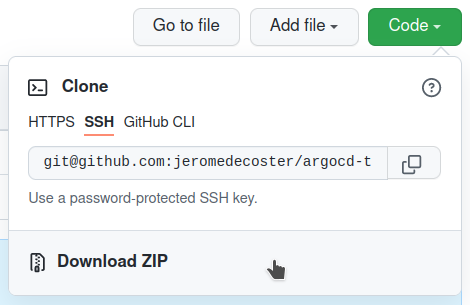
Now create a new Github repository that matches the address you defined above :
git@github.com:<YOUR_USERNAME>/argocd-test
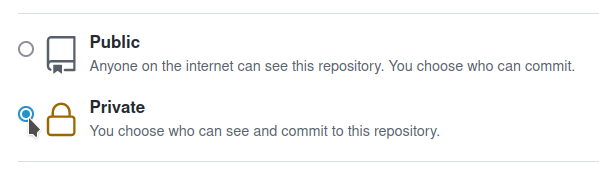
Make sure this project is private to best match a real project.
Commit your project on Github :
$ git add .
$ git commit -m :boom:
$ git push -u origin master
Install and start Minikube
Minikube lets you quickly create a Kubernetes cluster for local testing.
To install or update it you can follow the instructions on this page.
If you are on Linux like me you can run this one-line install command :
# one-line command to install minikube on Linux
$ wget https://storage.googleapis.com/minikube/releases/latest/minikube-linux-amd64 \
    --quiet \
    --show-progress \
    --output-document=/tmp/minikube-linux-amd64 \
    && sudo install /tmp/minikube-linux-amd64 /usr/local/bin/minikube
Kubectl is a cli tool to manage your kubernetes cluster.
You also need to install or update it to match the version of Minikube.
If you are on Linux like me you can run this one-line install command :
# one-line command to install kubectl on Linux
$ LATEST=$(wget https://storage.googleapis.com/kubernetes-release/release/stable.txt \
    --quiet \
    --output-document=-) \
    && wget https://storage.googleapis.com/kubernetes-release/release/$LATEST/bin/linux/amd64/kubectl \
    --quiet \
    --show-progress \
    --output-document=/tmp/kubectl \
    && chmod +x /tmp/kubectl \
    && sudo mv /tmp/kubectl /usr/local/bin/kubectl
We are now starting Minikube :
$ minikube start
After a fairly long time to set up, our cluster is working :
# check the kubectl current context
$ kubectl config current-context
minikube

# ping the cluster by listing the namespaces
$ kubectl get ns
NAME              STATUS   AGE
default           Active   2m00s
kube-node-lease   Active   2m00s
kube-public       Active   2m00s
kube-system       Active   2m00s
install Argo CD in our Kubernetes cluster
Argo CD is wonderful software that uses GitOps practice to perform continuous deployment specifically for Kubernetes.
Argo CD is installed within our kubernetes cluster, in a specific namespace.
Argo CD is a pull-based deployment tool. It watches a remote Git repository for new or updated manifest files and synchronizes those changes with the cluster.
To install Argo CD we execute this command :
# create the namespace
$ kubectl create namespace argocd

# apply the installation manifest
$ kubectl apply \
    --namespace argocd \
    --filename https://raw.githubusercontent.com/argoproj/argo-cd/stable/manifests/install.yaml
You can browse the install manifest online :
It is an impressive manifest. More than 10500 lines !
Let’s wait for all services and pods to be perfectly launched :
# wait for everything to be launched and running
$ watch kubectl get all --namespace argocd
NAME                                     READY   STATUS    RESTARTS   AGE
pod/argocd-application-controller-0      1/1     Running   0          100s
pod/argocd-dex-server-59d44b9f99-8kp7d   1/1     Running   0          100s
pod/argocd-redis-79bdbdf78f-247q5        1/1     Running   0          100s
pod/argocd-repo-server-b6f8cdc6f-4m8h5   1/1     Running   0          100s
pod/argocd-server-bdc697879-rdk89        1/1     Running   0          100s

NAME                            TYPE        CLUSTER-IP      EXTERNAL-IP   PORT(S)                      AGE
service/argocd-dex-server       ClusterIP   10.100.46.74    <none>        5556/TCP,5557/TCP,5558/TCP   100s
service/argocd-metrics          ClusterIP   10.98.170.62    <none>        8082/TCP                     100s
service/argocd-redis            ClusterIP   10.102.83.160   <none>        6379/TCP                     100s
service/argocd-repo-server      ClusterIP   10.96.100.93    <none>        8081/TCP,8084/TCP            100s
service/argocd-server           ClusterIP   10.96.151.61    <none>        80/TCP,443/TCP               100s
service/argocd-server-metrics   ClusterIP   10.102.166.2    <none>        8083/TCP                     100s

NAME                                 READY   UP-TO-DATE   AVAILABLE   AGE
deployment.apps/argocd-dex-server    1/1     1            1           100s
deployment.apps/argocd-redis         1/1     1            1           100s
deployment.apps/argocd-repo-server   1/1     1            1           100s
deployment.apps/argocd-server        1/1     1            1           100s

NAME                                           DESIRED   CURRENT   READY   AGE
replicaset.apps/argocd-dex-server-59d44b9f99   1         1         1       100s
replicaset.apps/argocd-redis-79bdbdf78f        1         1         1       100s
replicaset.apps/argocd-repo-server-b6f8cdc6f   1         1         1       100s
replicaset.apps/argocd-server-bdc697879        1         1         1       100s

NAME                                             READY   AGE
statefulset.apps/argocd-application-controller   1/1     100s
To be able to access the web interface of Argo CD we use this port-forward command :
$ kubectl port-forward \
    --namespace argocd \
    svc/argocd-server 8000:443
Forwarding from 127.0.0.1:8000 -> 8080
Forwarding from [::1]:8000 -> 8080
You can now open https://localhost:8000 and accept the insecure certificate :

To be able to login we need to get the admin password like this :
# get admin password
$ kubectl get secret argocd-initial-admin-secret \
    --namespace argocd \
    --output jsonpath="{.data.password}" \
    | base64 --decode \
    && echo
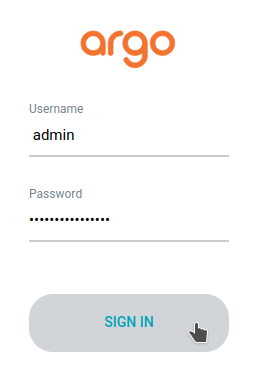
We connect :
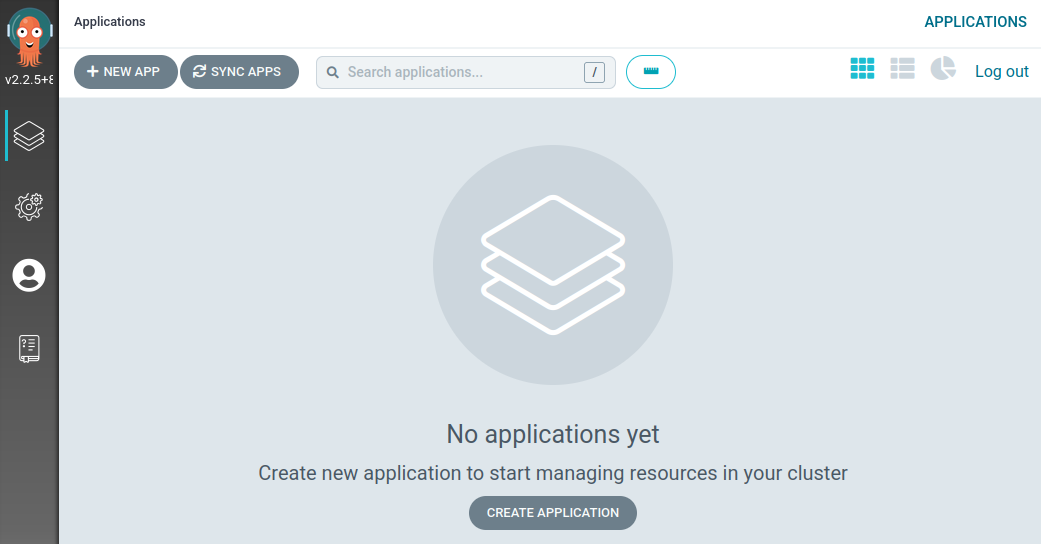
We are connected :
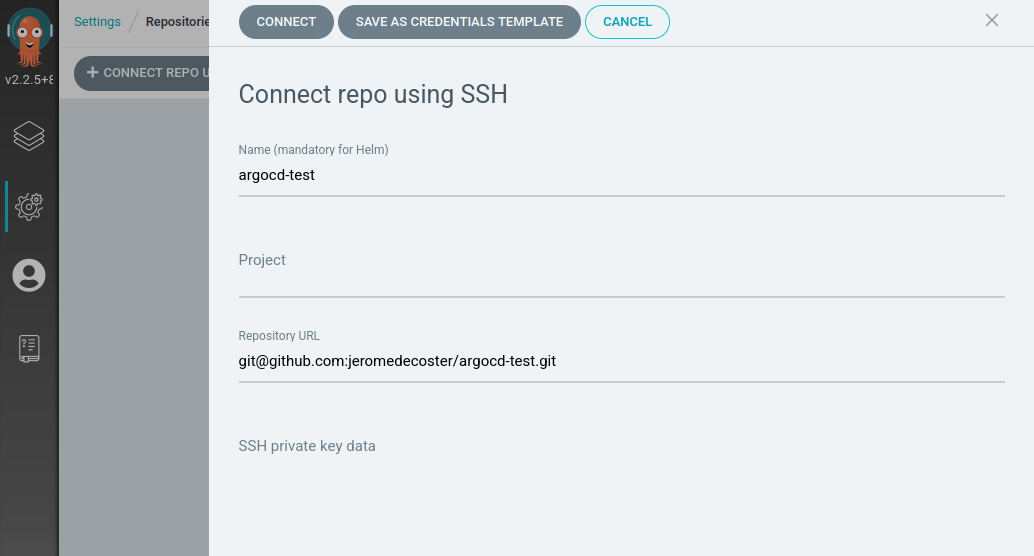
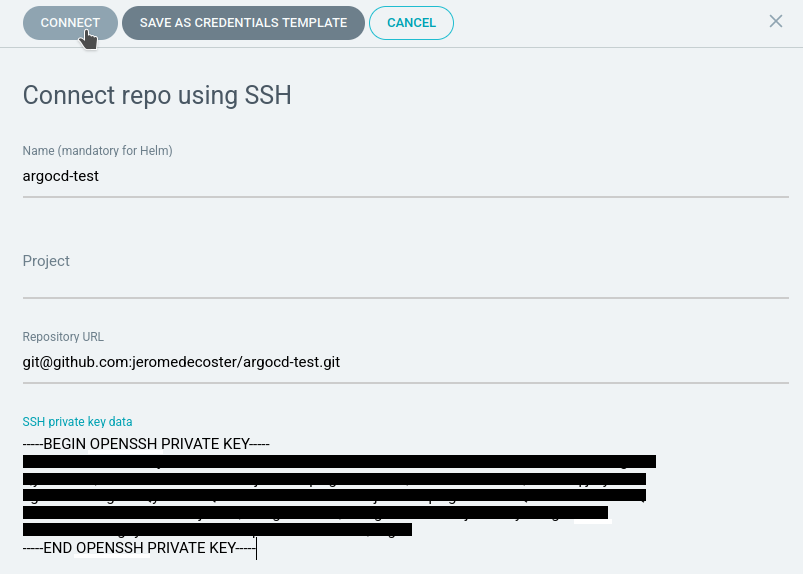
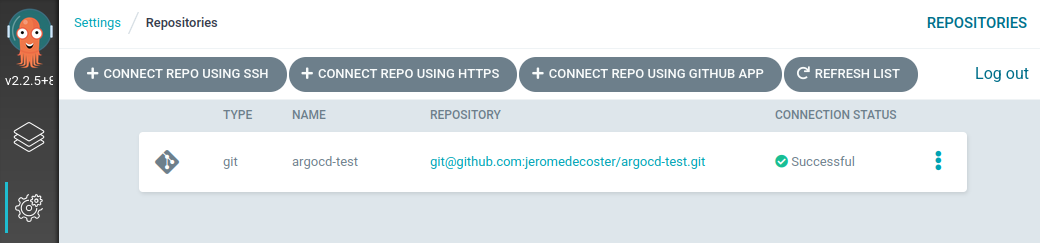
Connect to a private repository
Here are the steps to get Argo CD to connect to a private repository


We will create an SSH key for our project.
I create a key of type ed25519 using the .pem extension
$ ssh-keygen -t ed25519 -f ~/.ssh/argocd-test.pem
Enter passphrase (empty for no passphrase): # <press-enter>
Enter same passphrase again: # <press-enter>
Your identification has been saved in /home/xxxxx/.ssh/argocd-test.pem
Your public key has been saved in /home/xxxxx/.ssh/argocd-test.pem.pub
I rename the generated public file argocd-test.pem.pub to argocd-test.pub
$ mv ~/.ssh/argocd-test.pem.pub ~/.ssh/argocd-test.pub
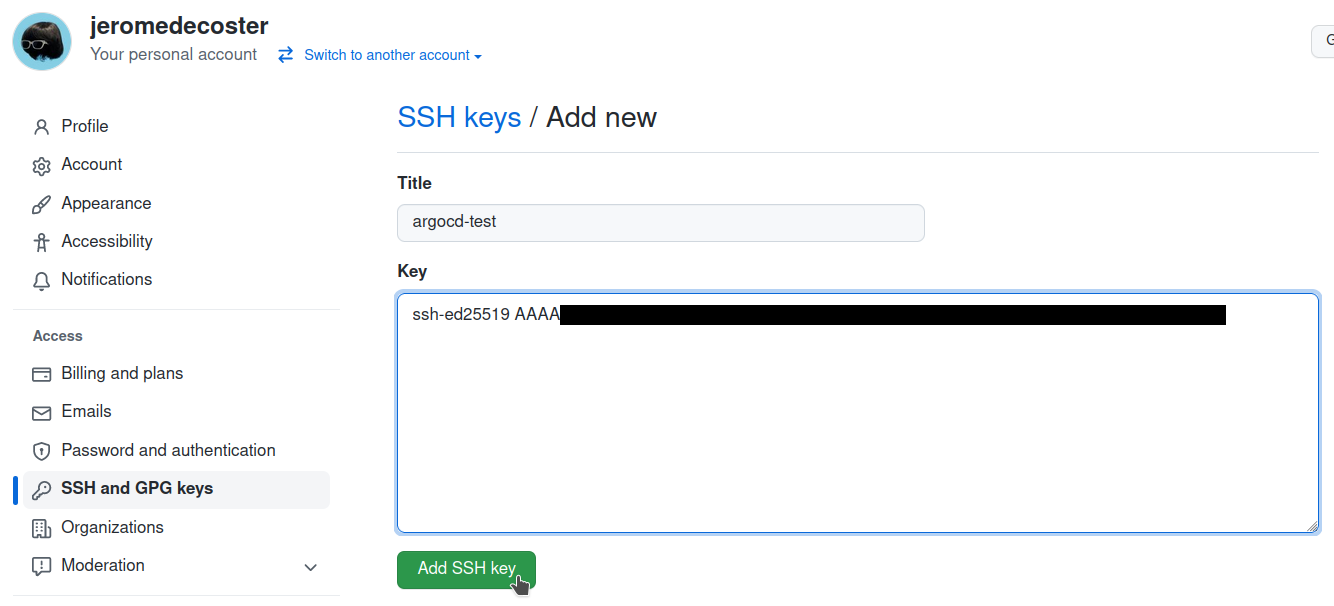
Now I display my public key so I can copy-paste it :
$ cat ~/.ssh/argocd-test.pub
ssh-ed25519 AAAAxxxxxxxxxxxxxxxxxxxxxxxxxxxxxxxxxxxxxxxxxxxxxxxxxxxxxxxxxxxxxxxx username@computer
I will now add this key in my main settings on Github :
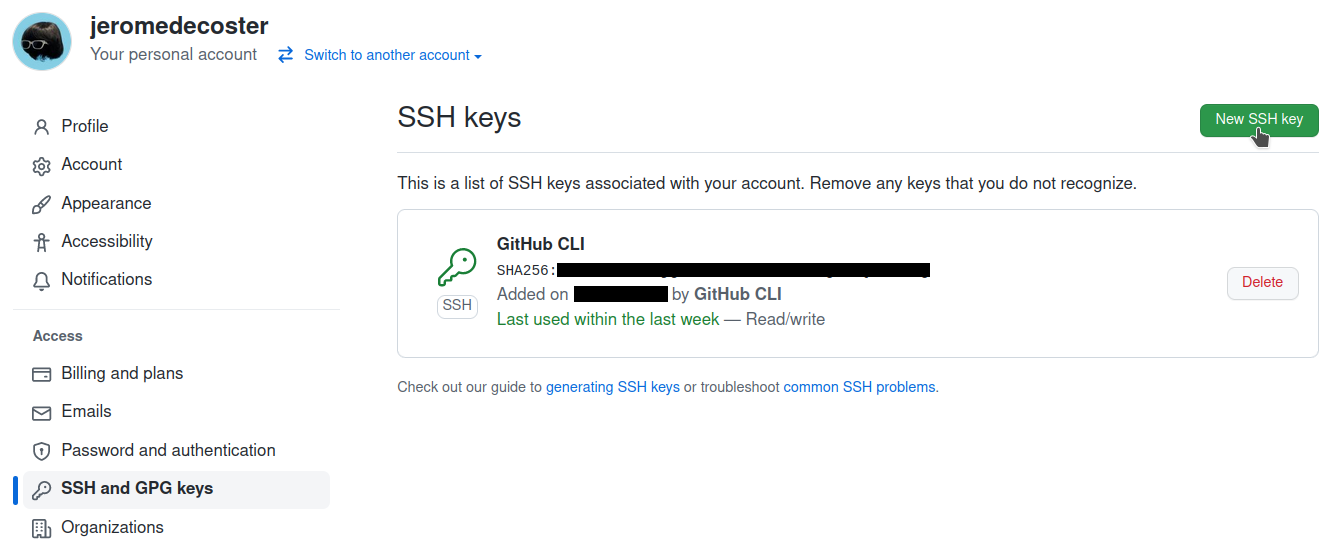
I add it :

Now I display my private key so I can copy-paste it :
$ cat ~/.ssh/argocd-test.pem
-----BEGIN OPENSSH PRIVATE KEY-----
b3Blxxxxxxxxxxxxxxxxxxxxxxxxxxxxxxxxxxxxxxxxxxxxxxxxxxxxxxxxxxxxxxxxxx
xxxxxxxxxxxxxxxxxxxxxxxxxxxxxxxxxxxxxxxxxxxxxxxxxxxxxxxxxxxxxxxxxxxxxx
xxxxxxxxxxxxxxxxxxxxxxxxxxxxxxxxxxxxxxxxxxxxxxxxxxxxxxxxxxxxxxxxxxxxxx
xxxxxxxxxxxxxxxxxxxxxxxxxxxxxxxxxxxxxxQFBgc=
-----END OPENSSH PRIVATE KEY-----
Deploying the application in Argo CD
To create an application in Argo CD, we use a manifest of type Application :
apiVersion: argoproj.io/v1alpha1
kind: Application
metadata:
  name: argocd-app
  namespace: argocd
spec:
  project: default

  source:
    repoURL: git@github.com:jeromedecoster/argocd-test.git
    targetRevision: HEAD
    path: k8s
  destination:
    server: https://kubernetes.default.svc
    namespace: my-app

  syncPolicy:
    syncOptions:
    - CreateNamespace=true

    automated:
      selfHeal: true
      prune: true
You can consult the documentation about the options of Automated Sync Policy
This manifest uses the Kubernetes Custom Resource Definition (CRD). This extends the functionality of Kubernetes.
We create a resource dedicated to Argo CD by defining it by these 2 properties :
apiVersion: argoproj.io/v1alpha1
kind: Application
Custom Resource Definitions are one of the great strengths and flexibility of Kubernetes.
If you are curious you can see here the YAML code allowing to create Application type manifests :
apiVersion: apiextensions.k8s.io/v1
kind: CustomResourceDefinition
metadata:
  labels:
    app.kubernetes.io/name: applications.argoproj.io
    app.kubernetes.io/part-of: argocd
  name: applications.argoproj.io
spec:
  group: argoproj.io
  names:
    kind: Application
    listKind: ApplicationList
    plural: applications
    shortNames:
    - app
    - apps
    singular: application
  # ...
To declare our application we execute this command within our project directory :
$ kubectl apply --filename argocd-app.yaml

Access our application through the browser
We list the services running in our Minikube cluster :
$ minikube service list
|-------------|-----------------------|--------------|---------------------------|
|  NAMESPACE  |         NAME          | TARGET PORT  |            URL            |
|-------------|-----------------------|--------------|---------------------------|
| argocd      | argocd-dex-server     | No node port |                           |
| argocd      | argocd-metrics        | No node port |                           |
| argocd      | argocd-redis          | No node port |                           |
| argocd      | argocd-repo-server    | No node port |                           |
| argocd      | argocd-server         | No node port |                           |
| argocd      | argocd-server-metrics | No node port |                           |
| default     | kubernetes            | No node port |                           |
| kube-system | kube-dns              | No node port |                           |
| my-app      | my-app-svc            |         9000 | http://192.168.49.2:31000 |
|-------------|-----------------------|--------------|---------------------------|
Another way to display our service URL :
$ minikube service --url my-app-svc --namespace my-app
http://192.168.49.2:31000
In a new terminal window you can run this command :
$ watch curl --silent $(minikube service --url my-app-svc --namespace my-app)
Displays the result of the curl call every 2 seconds :
Every 2,0s: curl --silent http://192.168.492:31000

version 1-0-0
Our application use http-echo :
  # ...
  spec:
    containers:
    - name: my-app
      image: hashicorp/http-echo
      args:
      - "-text=version 1-1-0"
      ports:
      - containerPort: 5678
http-echo is a simple but useful tool to simply display text content through an HTTP server.
# let's do a little test ...
$ docker pull hashicorp/http-echo

$ docker run -p 5000:5678 \
    hashicorp/http-echo \
    -text="Hello..."

# in another terminal window ...
$ curl localhost:5000
Hello...
And our message is simply version 1-0-0
Creating a tunnel with Ngork
By default Argo CD checks for changes in the Git repository every 3 minutes.
If we want the deployment of changes to be almost instantaneous, we must set up a Github webhook.
The webhook system is push based.
In order for Github.com to send an event to our cluster in localhost, we will create a tunnel using ngrok.

Once the application is installed and authenticated, we create our tunnel very simply :
$ ngrok http https://localhost:8000
We get some URLs :
Web Interface                 http://127.0.0.1:4040
Forwarding                    http://aaaa-bbb-ccc-dd-eee-fff-ggg-hhhh-iiii.ngrok.io -> https://localhost:8000
Forwarding                    https://aaaa-bbb-ccc-dd-eee-fff-ggg-hhhh-iiii.ngrok.io -> https://localhost:8000
By copy-pasting the https address obtained, we can access out Argo CD interface from an online URL. It is magic !
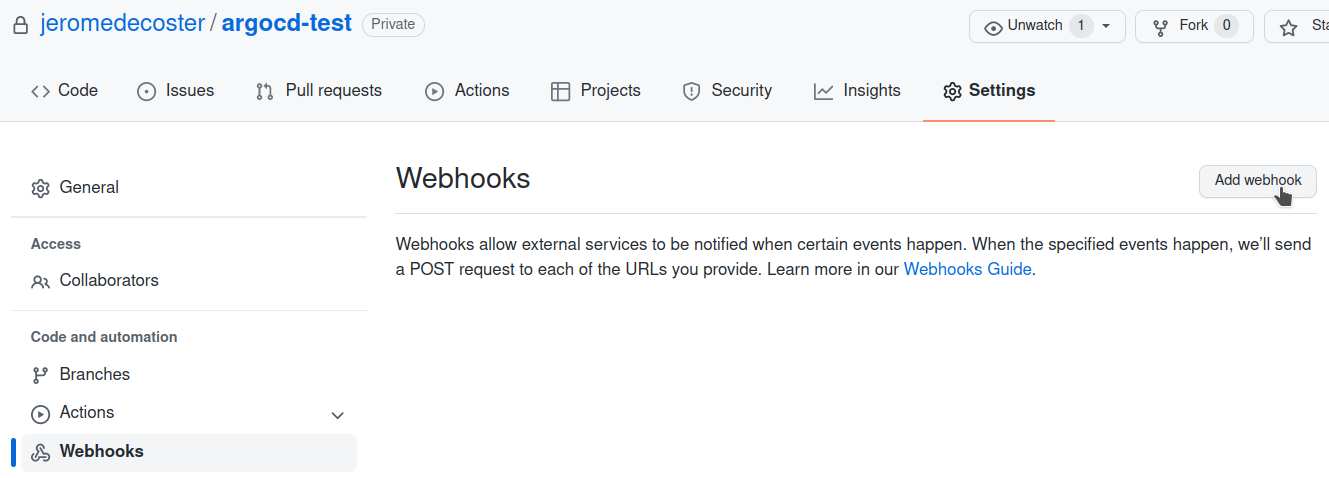
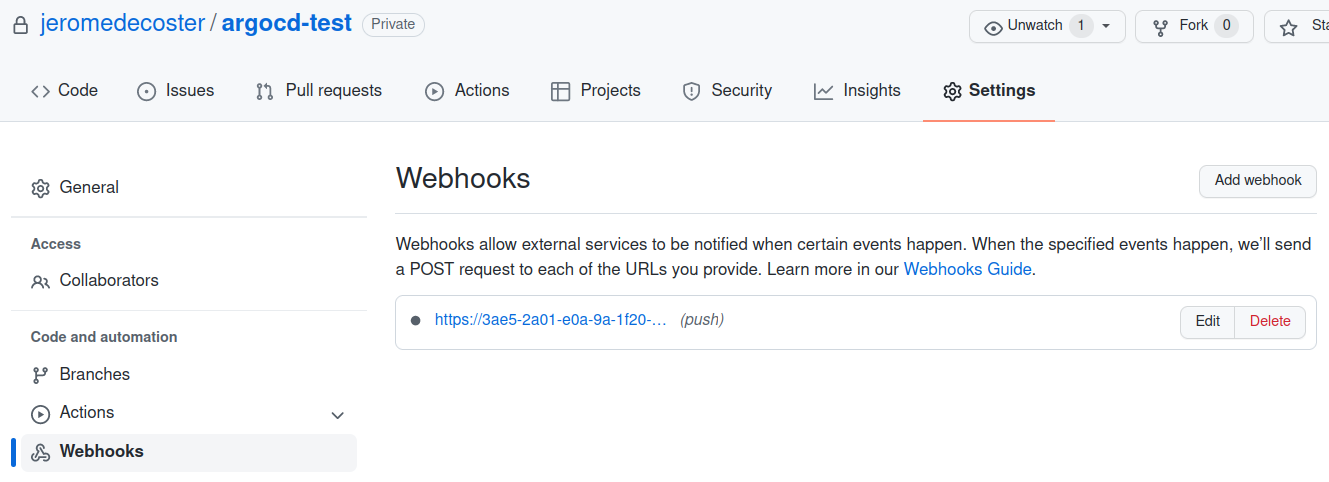
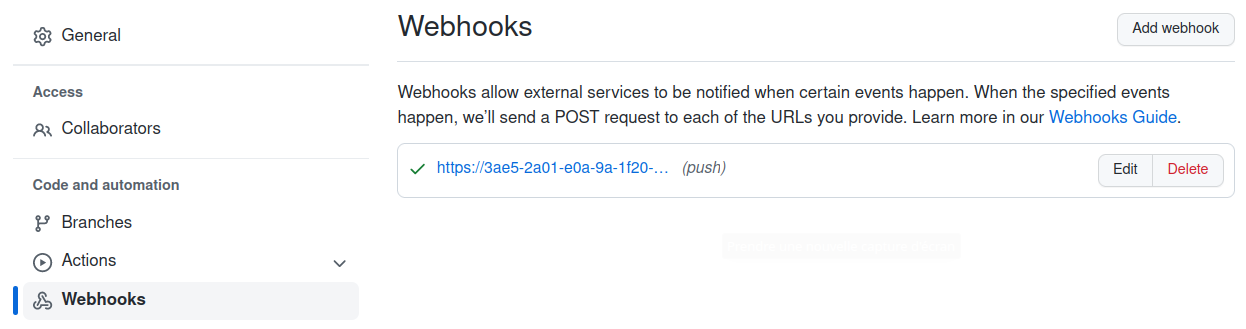
Creation of the webhook
In the Webhooks tab of our Github repository :
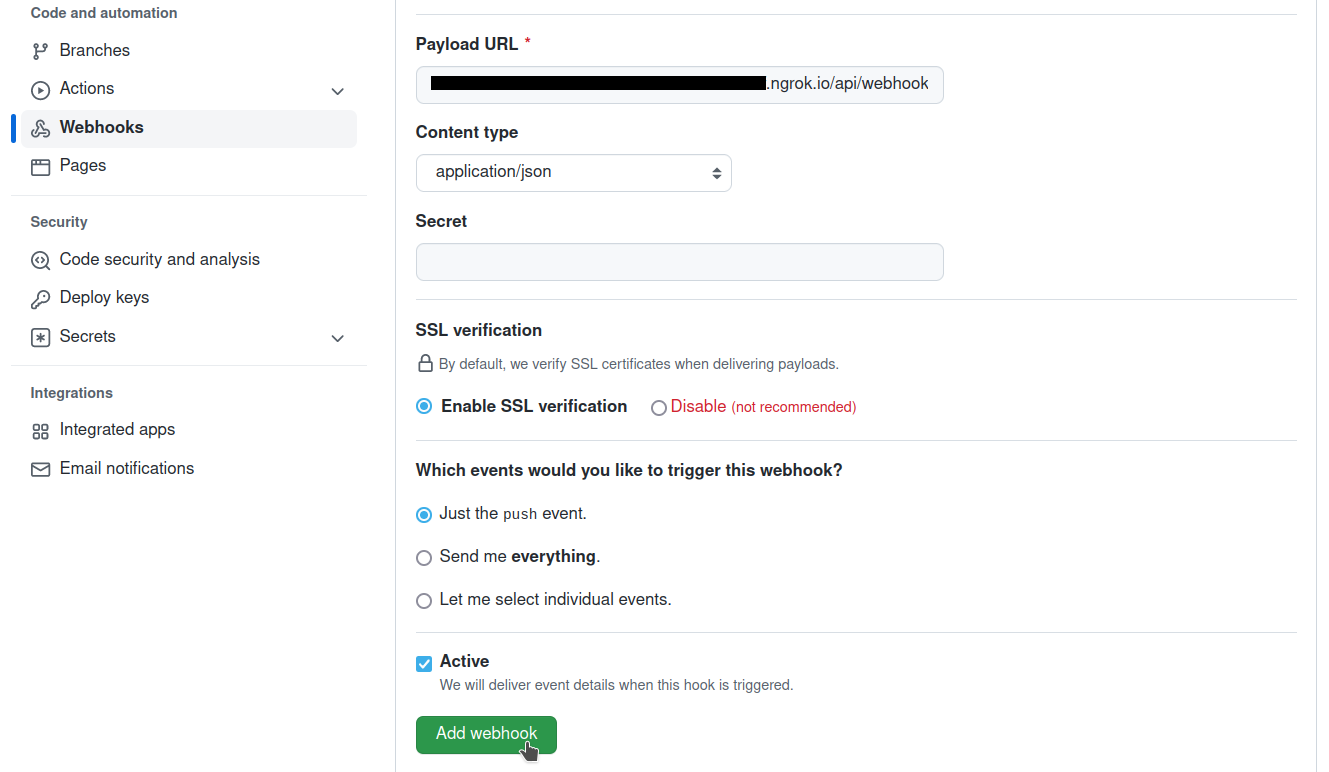
As written in the documentation, we need to :
- Add the path :
/api/webhook - Choose the content type :
application/json
So we have somethis like :
https://aaaa-bbb-ccc-dd-eee-fff-ggg-hhhh-iiii.ngrok.io/api/webhook
It has been added. It is still gray because it has not been used yet :
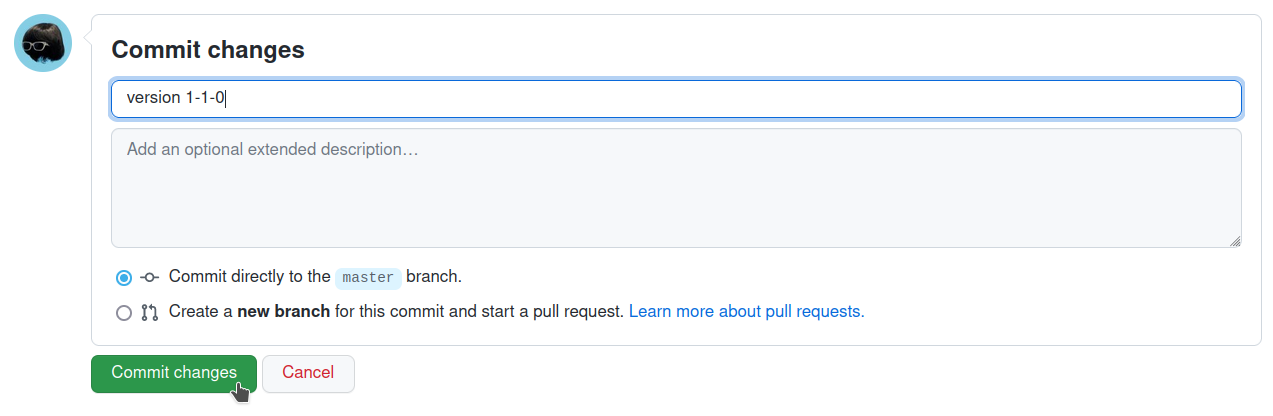
I edit the deployment file directly on Github.
I modify the version of our site :
      - name: my-app
        image: hashicorp/http-echo
        args:
-       - "-text=version 1-0-0"
+       - "-text=version 1-1-0"
        ports:
        - containerPort: 5678
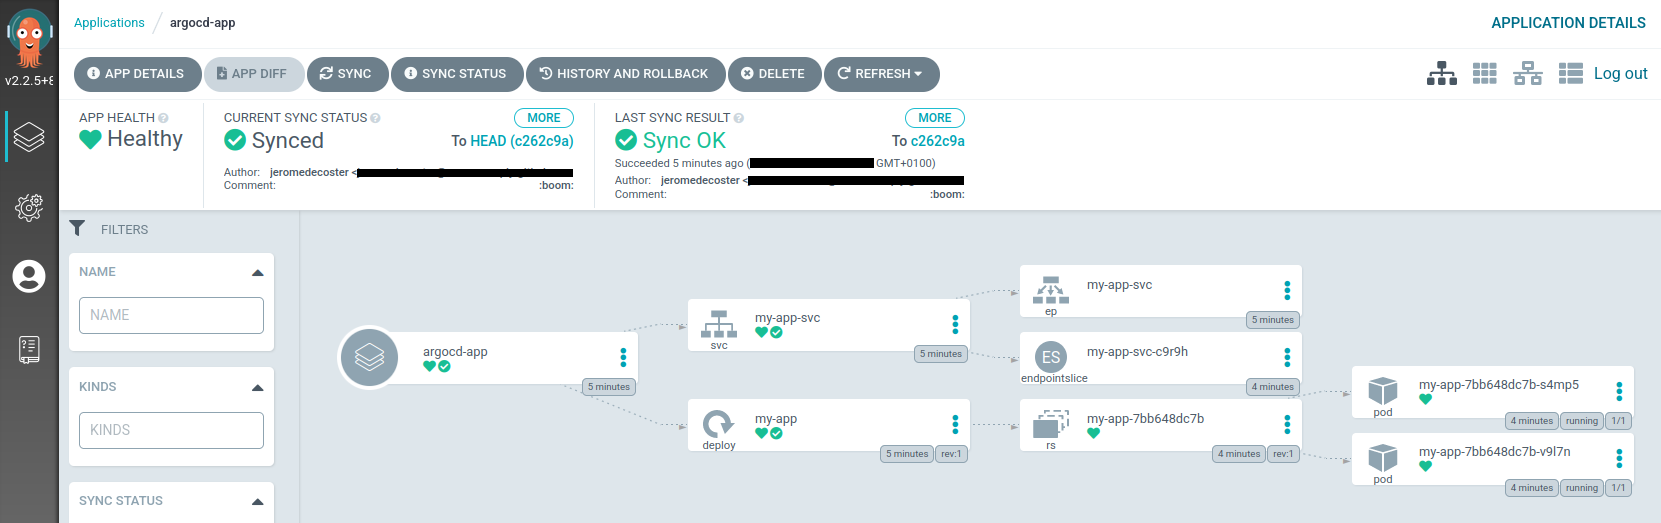
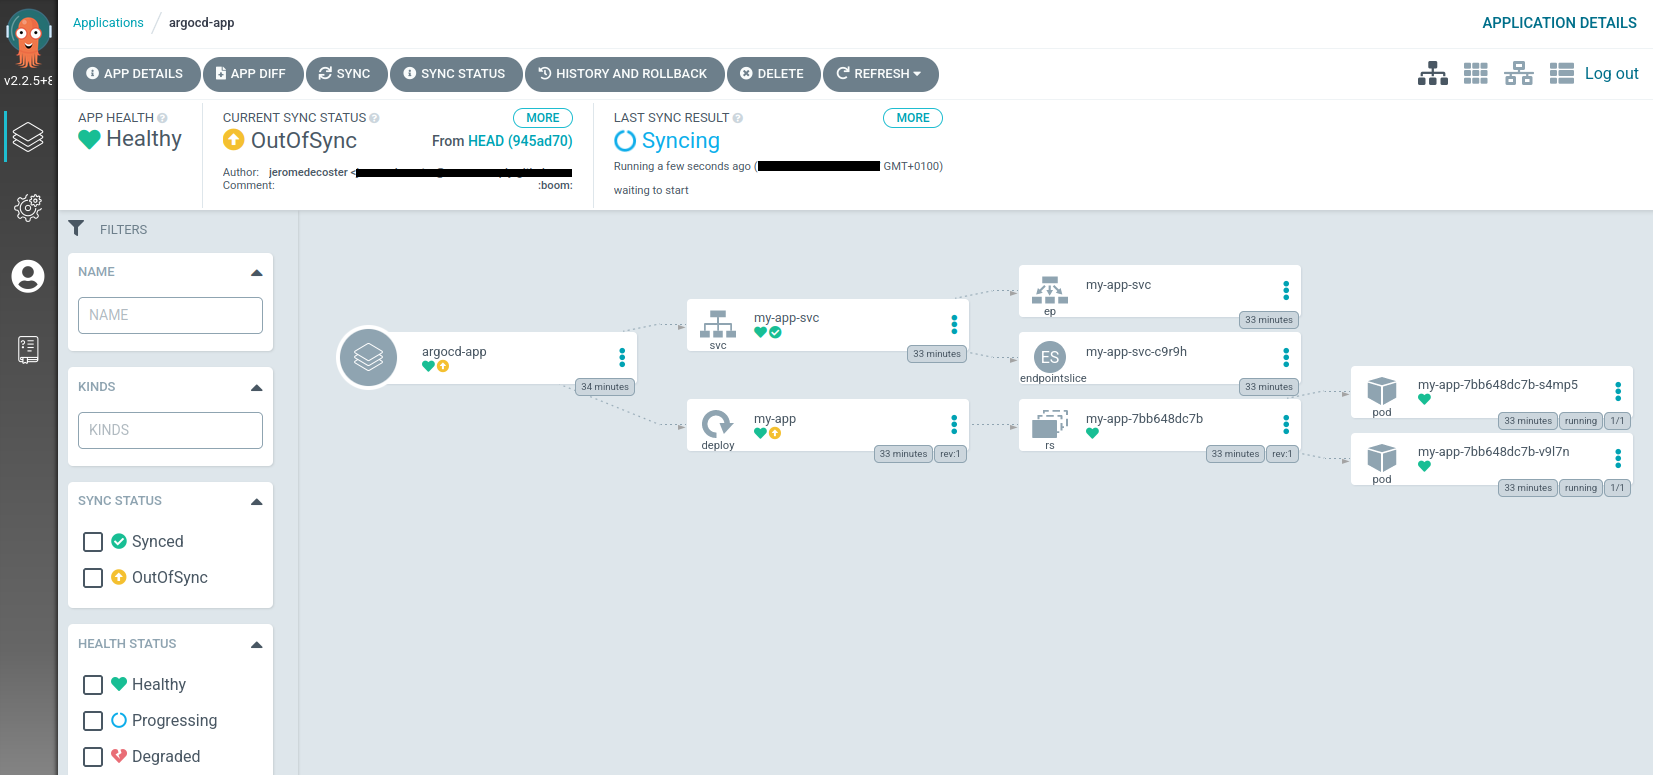
I notice that the synchronization starts immediately in Argo CD :
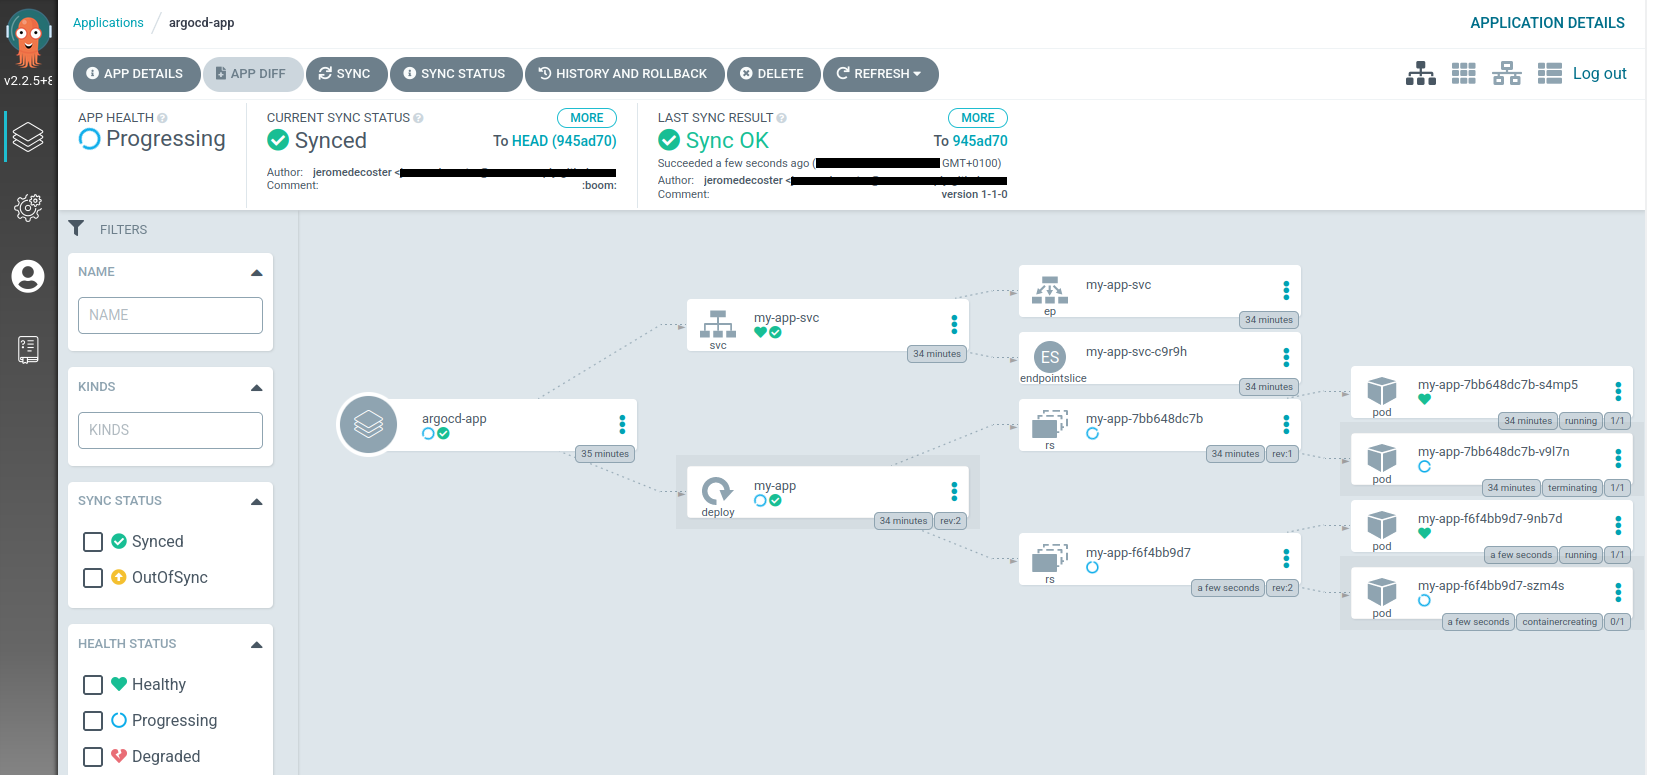
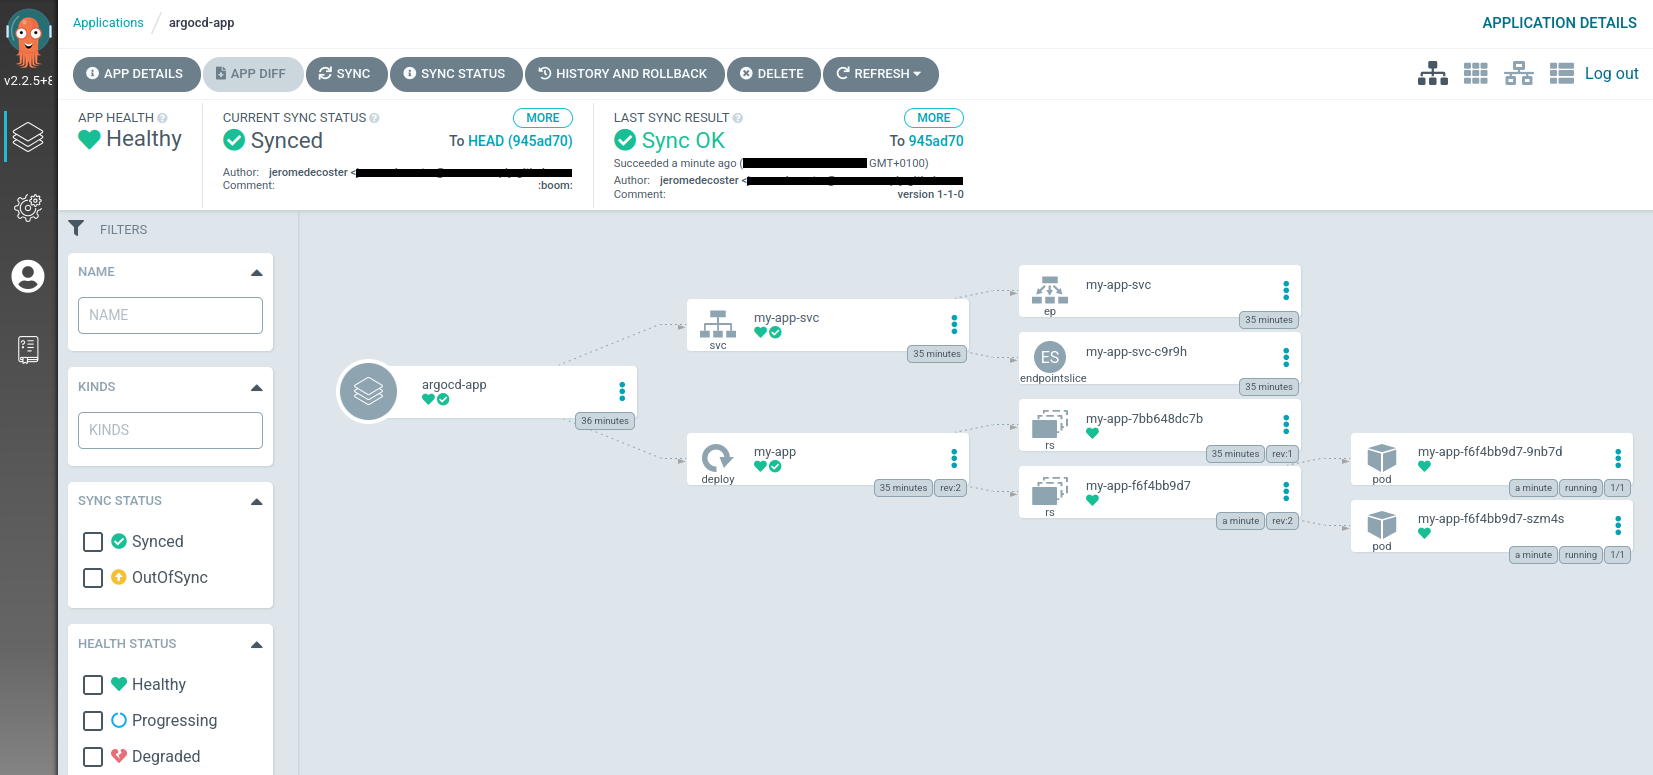
And after a few seconds my terminal window shows :
Every 2,0s: curl --silent http://192.168.492:31000

version 1-1-0
The web hook worked fine, it is no longer grey :
Our demo is over, we can delete our cluster :
$ minikube stop