
git-flow + github
Check this good cheatsheet.
Install and setup the project
Get the code from this github repository :
- The source code for this project is used to create a clean, ready-to-use docker image.
# download the code
$ git clone \
    --depth 1 \
    https://github.com/jeromedecoster/note-git-flow.git \
    /tmp/note

# cd
$ cd /tmp/note

# docker pull ubuntu + create settings.sh
$ make setup
After the setup, we need to define the variables inside the settings.sh file :
GIT_CONFIG_EMAIL=
GIT_CONFIG_NAME=

GITHUB_LOGIN=
GITHUB_PASSWORD=
Now we can build the flow docker image with the init.sh and install.sh scripts :
- Install git, git-flow, curl, zsh, nano, oh-my-zsh
- Configure git and ~/.netrc
# build the image
$ make init
Now we can create a github repository :
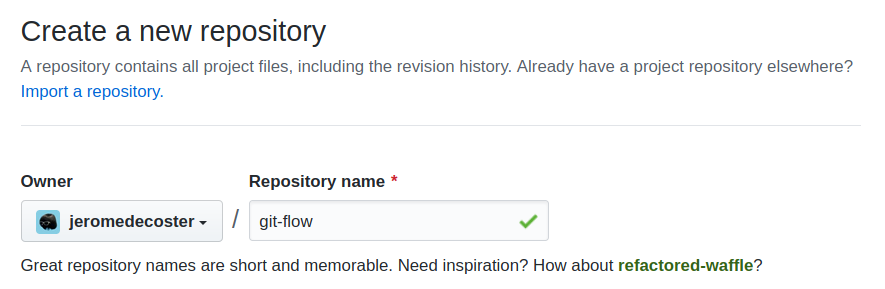
Note the HTTPS URL :

Test git-flow
git-flow in 7 points :
- The master branch is the stable branch, ready to be pushed in production.
- The develop branch is the branch where we work. With the latest features.
- When we want to add a new feature to the development branch, we create a feature.
- Each added feature is isolated in a specific branch. Once the development of a functionality is finished, we will merge it in the develop branch.
- When the work on the develop branch is finished and valid we will create a release.
- A release is also a specific branch.
- when we decide to finish the release, it will be merged into the master branch.
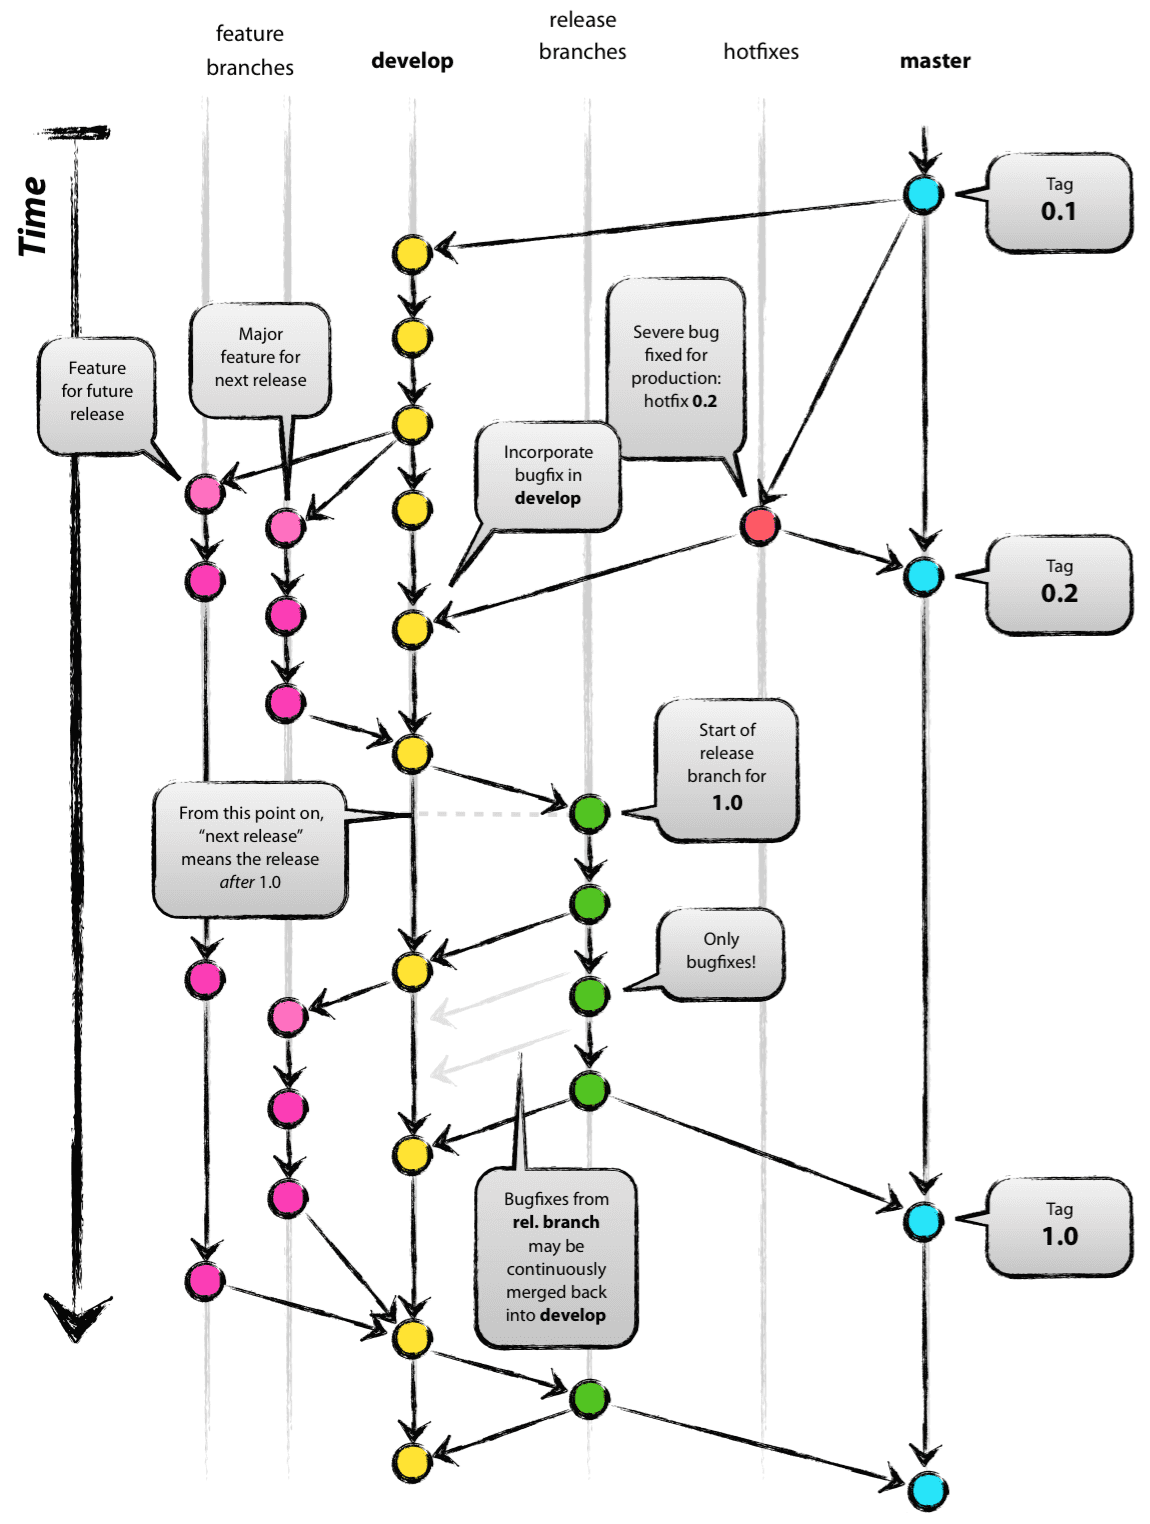
In reality, it is a little more complicated, but the main idea is well summarized in these 7 points. Read the full explanations.
Let’s start our docker image :
# run the image
$ docker run \
    --rm \
    --interactive \
    --tty \
    flow

# you should see the following prompt
➜  /tmp
Let’s clone the repository we just created on github :
# replace with your URL
➜  /tmp git clone https://github.com/jeromedecoster/git-flow.git

# cd
➜  /tmp cd git-flow
➜  git-flow git:(master)
Let’s initialize git flow :
# initialize git flow
➜  git-flow git:(master) git flow init --defaults

# we are now on the `develop` branch
➜  git-flow git:(develop)
Let’s create a feature :
# create a feature
➜  git-flow git:(develop) git flow feature start feature-1

# we are now on the `feature/feature-1` branch
➜  git-flow git:(feature/feature-1)
Let’s create and commit some changes :
➜  git-flow git:(feature/feature-1) echo '## feature-1\n' >> readme.md
➜  git-flow git:(feature/feature-1) ✗ git add --all
➜  git-flow git:(feature/feature-1) ✗ git commit --message feature-1
If our work is completed, we can finish the feature :
# finish the feature
➜  git-flow git:(feature/feature-1) git flow feature finish feature-1

# we are back on the `develop` branch
➜  git-flow git:(develop)

# the `feature/feature-1` branch was deleted
➜  git-flow git:(develop) git branch
* develop
  master
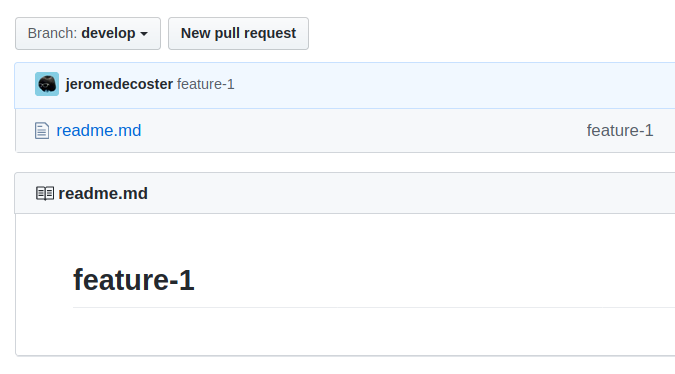
Let’s push the develop branch on github :
- We use the
-u(same as--set-upstream) option because it’s the first time we push this branch.
# push to github
➜  git-flow git:(develop) git push -u origin develop
It’s online :
Let’s create and commit another feature :
# create a feature
➜  git-flow git:(develop) git flow feature start feature-2

# some changes
➜  git-flow git:(feature/feature-2) echo '## feature-2\n' >> readme.md
➜  git-flow git:(feature/feature-2) ✗ git add --all
➜  git-flow git:(feature/feature-2) ✗ git commit --message feature-2

# finish the feature
➜  git-flow git:(feature/feature-2) git flow feature finish feature-2
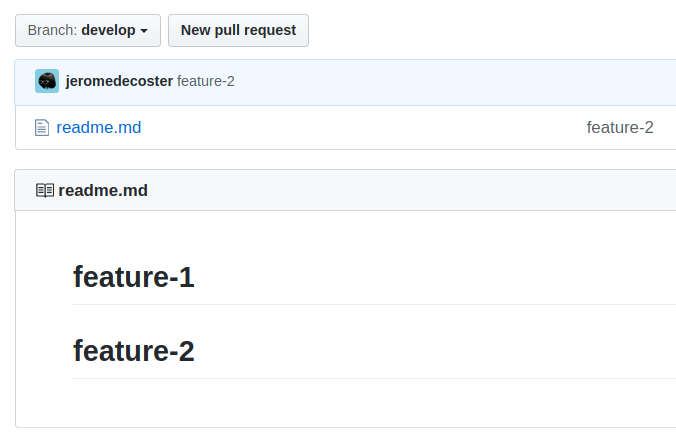
Now we can push the develop branch on github with this shorten command :
➜ git-flow git:(develop) git push
It’s online :
This project is now ready to be shipped, we will create a release :
# create a release
➜  git-flow git:(develop) git flow release start v1.0.0

# we are on the `release/v1.0.0` branch
➜  git-flow git:(release/v1.0.0)
Let’s create and commit the changelog, then finish the release :
# some changes
➜  git-flow git:(release/v1.0.0) echo '# v1.0.0\n' >> changelog.md
➜  git-flow git:(release/v1.0.0) git add --all
➜  git-flow git:(release/v1.0.0) git commit --message v1.0.0

# finish the feature
➜  git-flow git:(release/v1.0.0) git flow release finish v1.0.0
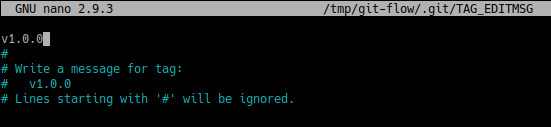
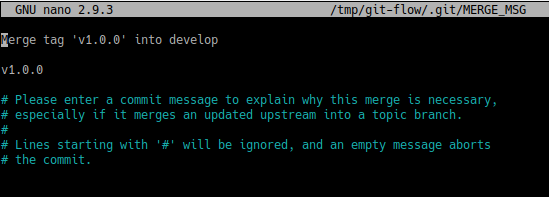
Now we have 3 commit messages to write :
- For the first message, I leave the default message :
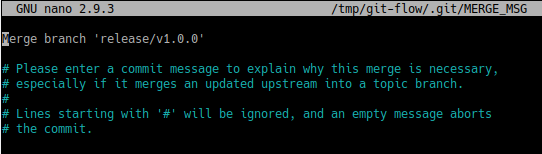
- For the second message, I write the current message :
- For the third message, I leave the default message :
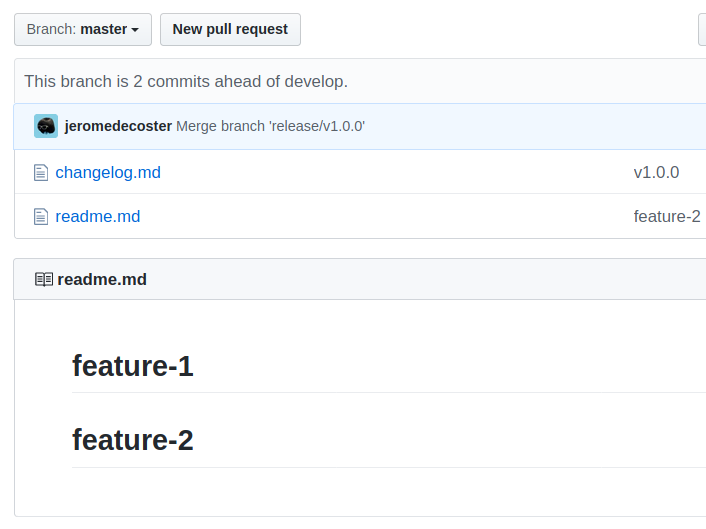
The release is finished, this means :
- We are now back on the develop branch.
- The master branch received the previous features.
- We can push the master branch to github. We push with the long command because it’s the first time.
# we are back on the `develop` branch
➜  git-flow git:(develop)

# push to github (with -u)
➜  git-flow git:(develop) git push -u origin master
Unfortunately the tag was not put on the github repository :
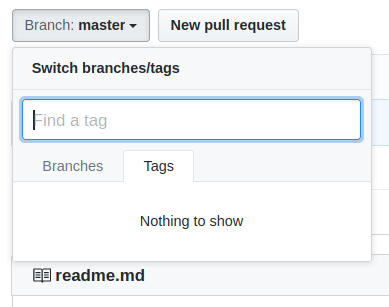
We need to execute this command :
# push all local tags
➜  git-flow git:(develop) git push --tags
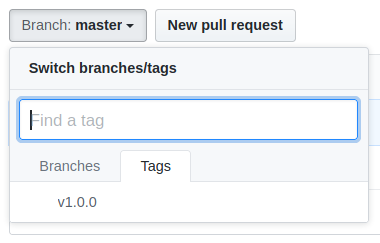
This is now done :
Let’s check the logs :
➜ git-flow git:(develop) git log --graph --oneline

A simplified view :
➜ git-flow git:(develop) git log --graph --oneline --first-parent develop
